Outlook 2010 Setup Instructions
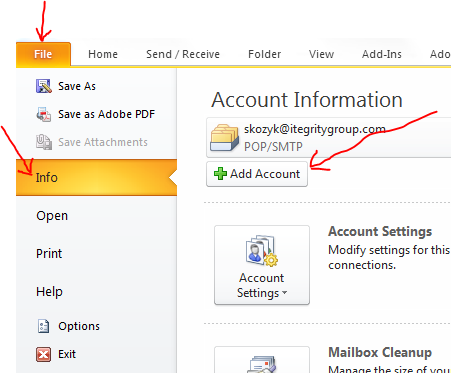
1. From the main navigation menu, select “File” and in the dropdown menu, select “Info“. To the right of “Info” in “Account Information” pane, click on the “New Account” button.
2. After the “Auto Account Setup” window pops up, select the “Manually configure server settings or additional server types” radio button.
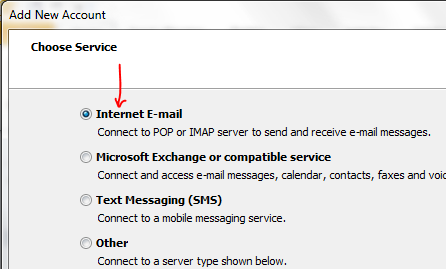
3. In the next window that appears, make sure the “Internet E-mail” radio button is selected.
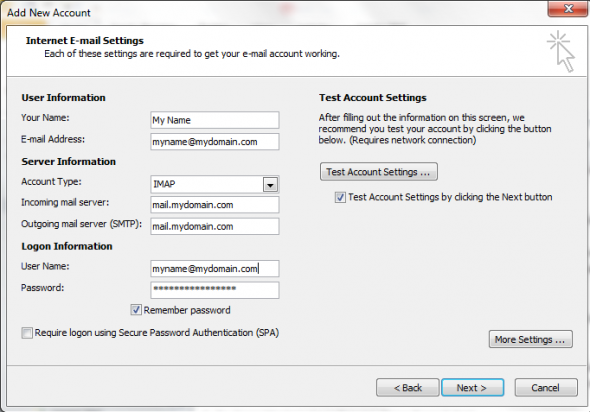
4. The “Internet E-mail Settings” window should now appear. Enter your information as shown in following example making sure you select IMAP as your Account Type and use your entire email address as your user name. The incoming and outgoing servers should both be the same, mail.mydomain.com, where mydomian.com is your domain name, for example mail.itegritygroup.com. “Require logon using Secure Password Authentication (SPA)”, should NOT be checked.
5. Click on the “More Settings …” button.
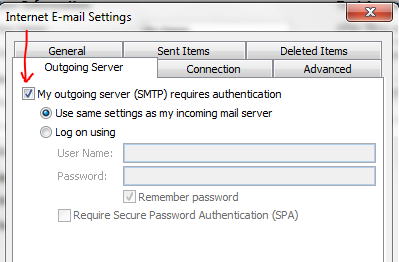
6. Select the “Outgoing Server” tab. Check the box next to “My outgoing server (SMTP) requires authentication” and make sure the first radio button is selected, “Use same settings as my incoming mail server”.
7. Select the “Advanced” tab. You shouldn’t have to make changes to this page, but it’s a good idea to double check the settings. For IMAP, the “Incoming server (IMAP)” should be set to 143 and “Outgoing server (SMTP)” to 25.
8. At this point your email should be configured properly. Click the “OK“ button and you’ll be taken back to the “Internet E-mail Settings” window. Click on the “Test Account Settings” button and if a test email is able to be sent and received successfully then you’re finished. Click on the “Next“ button and then “Finish“ in the window that follows.


